Tools and Materials Preparation
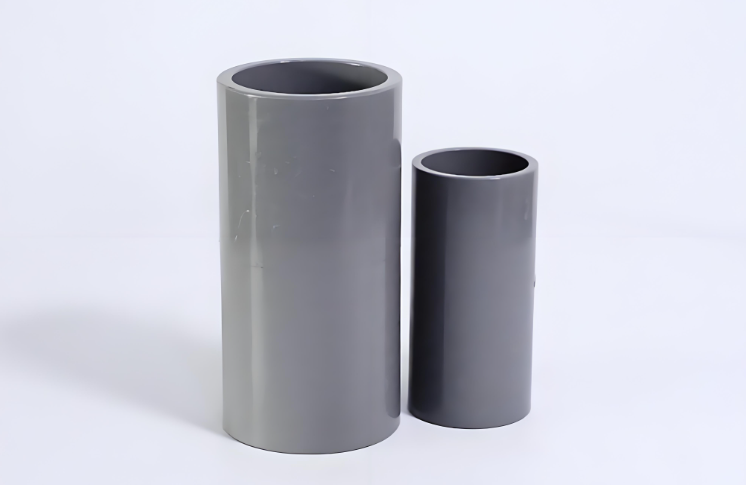
PVC Pipes and Fittings: Select the appropriate size and type of PVC pipes and fittings according to your project requirements. For example, in a plumbing project, you might need elbows, tees, couplings, and reducers in addition to the pipes. Make sure the nominal sizes and schedules of the pipes and fittings match.
Pipe Cutter or Hacksaw: A pipe cutter is the preferred tool for cutting PVC pipes as it provides a clean, straight cut. However, a hacksaw can also be used. When using a hacksaw, make sure to use a fine - toothed blade to prevent the pipe from cracking or chipping. For example, a standard PVC pipe cutter has a sharp wheel that rotates around the pipe as you turn the handle, scoring and cutting through the pipe evenly.
Deburring Tool: After cutting the pipe, a deburring tool is used to remove any rough edges or burrs. These burrs can affect the flow of fluid through the pipe and also make it difficult to insert fittings. A simple deburring tool looks like a small file with a rounded tip that can be inserted into the pipe and rotated to smooth the edges.
Solvent Cement and Primer: Solvent cement is used to join PVC pipes and fittings. A primer is often applied first to improve the bond. The solvent cement melts the surface of the PVC slightly, allowing the pipe and fitting to fuse together when joined. Different types of solvent cement are available for different schedules and sizes of PVC pipes.
Tools Required
Materials Needed
Pipe Cutting and Preparation
Use the deburring tool to remove any rough edges from the cut end of the pipe. Then, clean the pipe and the fittings with a clean, dry cloth to remove any dirt, debris, or grease. This is important because any contaminants can interfere with the bonding process of the solvent cement.
Place the PVC pipe on a stable surface and mark the point where you need to cut. If using a pipe cutter, align the cutter wheel with the mark and rotate the handle around the pipe until the pipe is cut through. If using a hacksaw, hold the pipe firmly and saw through it at a steady pace, keeping the cut as straight as possible.
After cutting, measure the length of the pipe again to ensure it meets the requirements of your installation. Any small discrepancies can lead to problems when fitting the pipes together.
Cutting the Pipe
Deburring and Cleaning
Fitting Installation
Apply a liberal amount of solvent cement to the outside of the pipe and the inside of the fitting. The amount of cement depends on the size of the pipe and fitting, but it should be enough to create a good seal. Insert the pipe into the fitting quickly and rotate it slightly (about a quarter - turn) to ensure an even distribution of the cement and a proper fit.
Hold the pipe and fitting together for a few seconds to allow the cement to set. The exact time may vary depending on the type of solvent cement and the ambient temperature. Avoid moving or disturbing the joint during this initial setting period.
Some PVC pipe installations recommend using a primer before applying the solvent cement. The primer helps to soften the PVC surface and creates a better bond. Apply the primer evenly to the outside of the pipe and the inside of the fitting using a small brush. Let it dry for a few seconds as per the manufacturer's instructions.
Note that not all PVC installations require a primer. Some modern solvent cements are designed to work without a primer, but it's always best to follow the manufacturer's recommendations.
Priming (if required)
Applying Solvent Cement and Joining
Checking and Testing the Installation
In irrigation or drainage systems, test the flow of water through the pipes. Open the valves or outlets and observe the water flow. Make sure the pipes are properly sloped (in the case of drainage) and that the water is distributed evenly (in the case of irrigation). Any blockages or slow - flowing areas may indicate a problem with the installation.
For plumbing applications, it's essential to test the system for leaks under pressure. You can use a pressure - testing device to pump air or water into the system and check for any pressure drops or leaks. Seal all the outlets and inlets of the system, except for the testing port, and gradually increase the pressure to the recommended level. Observe the system for at least 15 - 30 minutes to ensure there are no leaks.
After the solvent cement has dried, visually inspect the joints for any signs of gaps, leaks, or misalignment. A good joint should have a smooth transition between the pipe and the fitting with no visible cracks or spaces. If you notice any issues, it's best to cut out the joint and redo it.
Visual Inspection
Pressure and Leak Testing (for Plumbing Systems)
Flow Testing (for Irrigation or Drainage Systems)
Copyright Reserved 2025 SHENZHEN CHINA PIPE SUPPLIES
Fuyuan building NO.460 FanShen Road BaoAn District SHENZHEN City, GUANGDONG Prov. CHINA 518000

 +8617727596190